
DIY Wine Label Lamp Shade
DIY Wine Label Lamp Shade
If you are anything like me, you have a lot of empty wine & beer bottles with cool labels just “waiting” to be upcycled! (I mean A LOT, literally, the joke about “if they put box tops on wine labels, my kid’s school would be rich” is extremely true in my case, and most of my girlfriends would agree!) Here is a really fun and easy project to use some of the labels from your favorite wine bottles!
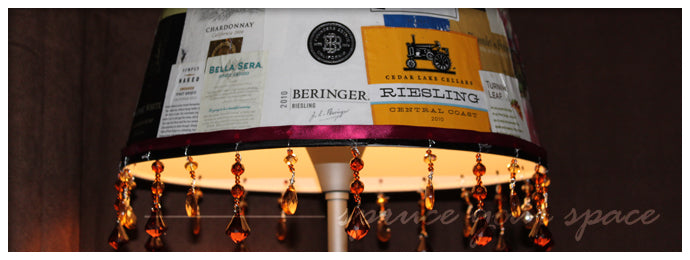
The Original Wine Label Lamp Shade

The original lamp shade, at Unkorked Wine Garden, Wentzville, MO
My neighbors recently went to a local wine garden, Unkorked, where they spotted this very interesting lamp shade. Admittedly, I’ve been there several times and have never seen it, so I’m not really sure when it “appeared”. They snapped a photo of it on their phone, and posted it for me on Facebook, saying “This is a project for you!”. And of course, Challenge Accepted!
Wine Label Lamp Shade Materials:
- About 20 Wine Bottles with Paper Labels
- 1 Medium Container Modge Podge
- 1 Flat Razor Blade (I used my cooktop scraper)
- 1 Plain/Cheap Lamp Shade
- Flat Paint Brush
- 1/4 inch or Thicker Ribbon (Beaded Ribbon is GREAT!)
You may need to lightly soak a few in warm water to loosen the adhesive. Take each label off and set aside until you’re finished. Patience is key with removing the labels so that you don’t rip them. Using the flat paint brush, brush a bit of modge podge in the area where you will be placing a label. Place the label over the modge podge, and apply more over the top until all edges are flat and the entire label is wet with the modge podge. I tried my best to use the best parts of the labels, and to cover all of the lamp shade’s original material. This meant cutting some pieces of label apart, using the back of the label, etc. If necessary, pour yourself a glass of wine once you get into the “flow”, you’re going to get thirsty! Once you’ve covered all of the surfaces with labels, allow the lampshade to dry for a few hours. (Appx 4-6 hours) I punched holes prior to adding the ribbon and used a maroon colored ribbon. Once the holes were punched, I added beads that I had pre-made to dangle from the bottom edge. You can purchase pre-beaded ribbon at most craft stores if you are not comfortable adding beads yourself, or just leave it finished with ribbon. 
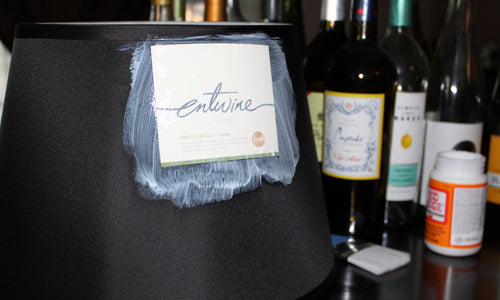
Step 1:Remove Labels from Wine Bottles

Step 2: Add Labels to Lamp Shade with Modge Podge
Step 3: Continue Adding Labels Until All Areas are Covered


Step 4: Let Dry

Step 5: Add Ribbon with a small line of Tacky Glue to the bottom and top edges to trim!